
Every organization, regardless of size, carries hidden weaknesses in its network — unpatched systems, misconfigured services, or forgotten test accounts. An internal vulnerability assessment is one of the most effective and affordable ways to uncover these gaps before an attacker does. This guide walks you through the process step by step, using tools and practices that any IT or security team can start applying today.
What Is an Internal Vulnerability Assessment?
An internal vulnerability assessment is a systematic review of your organization’s internal network, servers, and endpoints to identify security weaknesses. Unlike a penetration test, which actively exploits vulnerabilities to prove impact, an assessment focuses on discovery and prioritization — finding what’s wrong and ranking it by risk.
This makes it a great starting point for organizations building a security program, and a recurring exercise for mature teams that want continuous visibility into their attack surface.
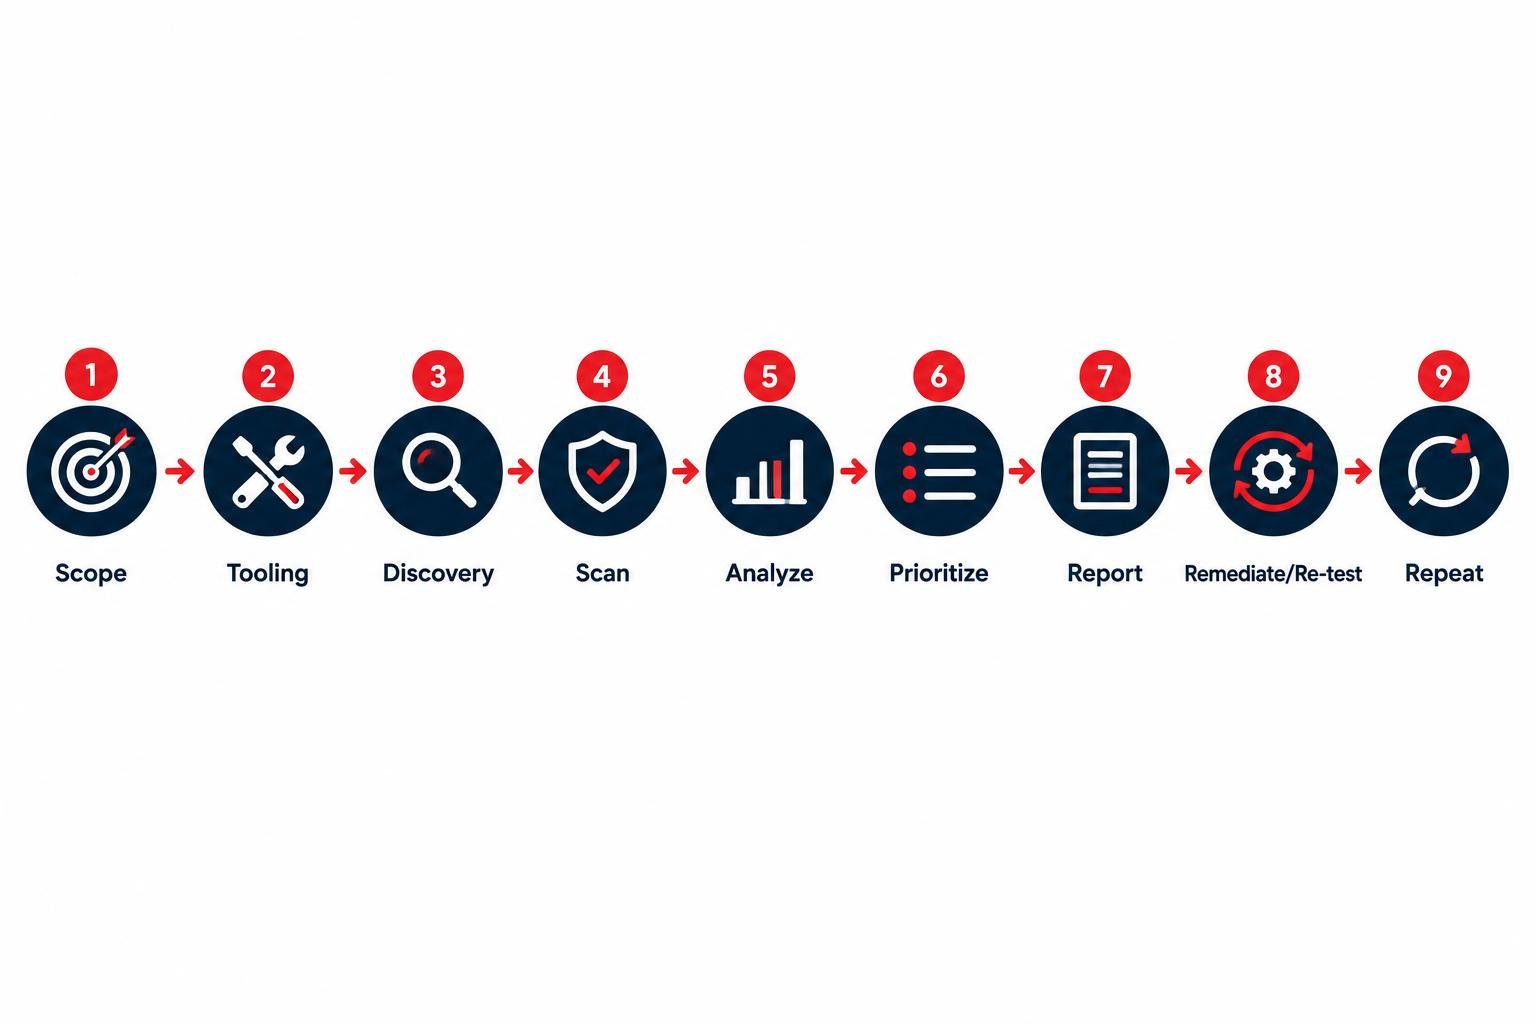
Step 1: Define Scope and Objectives
Before running any scan, decide what you’re assessing. Common scope questions include:
- Which subnets, VLANs, or business units are in scope?
- Are cloud workloads (AWS, Azure, GCP) included, or is this on-premises only?
- Will you assess servers, endpoints, network devices, or all three?
- What is the assessment window, and who needs to be notified in advance?
Document this scope in writing and get sign-off from IT operations. Scanning without authorization — even internally — can trigger false alarms, disrupt production systems, or create compliance issues.
Step 2: Choose Your Vulnerability Assessment Tooling
You don’t need an expensive enterprise suite to get started. Options include:
- Open-source: OpenVAS/Greenbone, Nmap (for discovery), Nikto (for web servers)
- Commercial: Tenable Nessus, Qualys, Rapid7 InsightVM
For a first assessment, a single well-configured scanner is enough. The goal is consistent, repeatable results — tool sprawl doesn’t equal better security.
Step 3: Asset Discovery
You can’t assess what you don’t know exists. Run a discovery scan across your defined scope to build (or validate) an asset inventory:
- Use an Nmap-based discovery scan or your scanner’s discovery mode to identify live hosts.
- Tag each asset with owner, function, and criticality (e.g., "Domain Controller — Critical").
- Flag any unexpected or unauthorized devices for immediate investigation — these are often the highest-risk findings of the entire exercise.
A clean asset inventory is the foundation of every future assessment, so invest real time here.
Step 4: Run the Vulnerability Scan (Authenticated vs. Unauthenticated)
With assets identified, configure and launch the scan:
- Select an authenticated scan where possible. Providing credentials lets the scanner check patch levels, configurations, and installed software far more accurately than an unauthenticated scan.
- Schedule scans during low-traffic windows to minimize performance impact.
- Start with a subset of critical systems if this is your first scan, then expand scope once you’re confident in the process.
- Let the scan complete fully — interrupting scans produces incomplete, misleading data.
Step 5: Analyze and Validate Results
Raw scanner output is noisy. Before reporting anything, validate findings:
- Remove false positives. Cross-check a sample of "critical" findings manually or against vendor advisories.
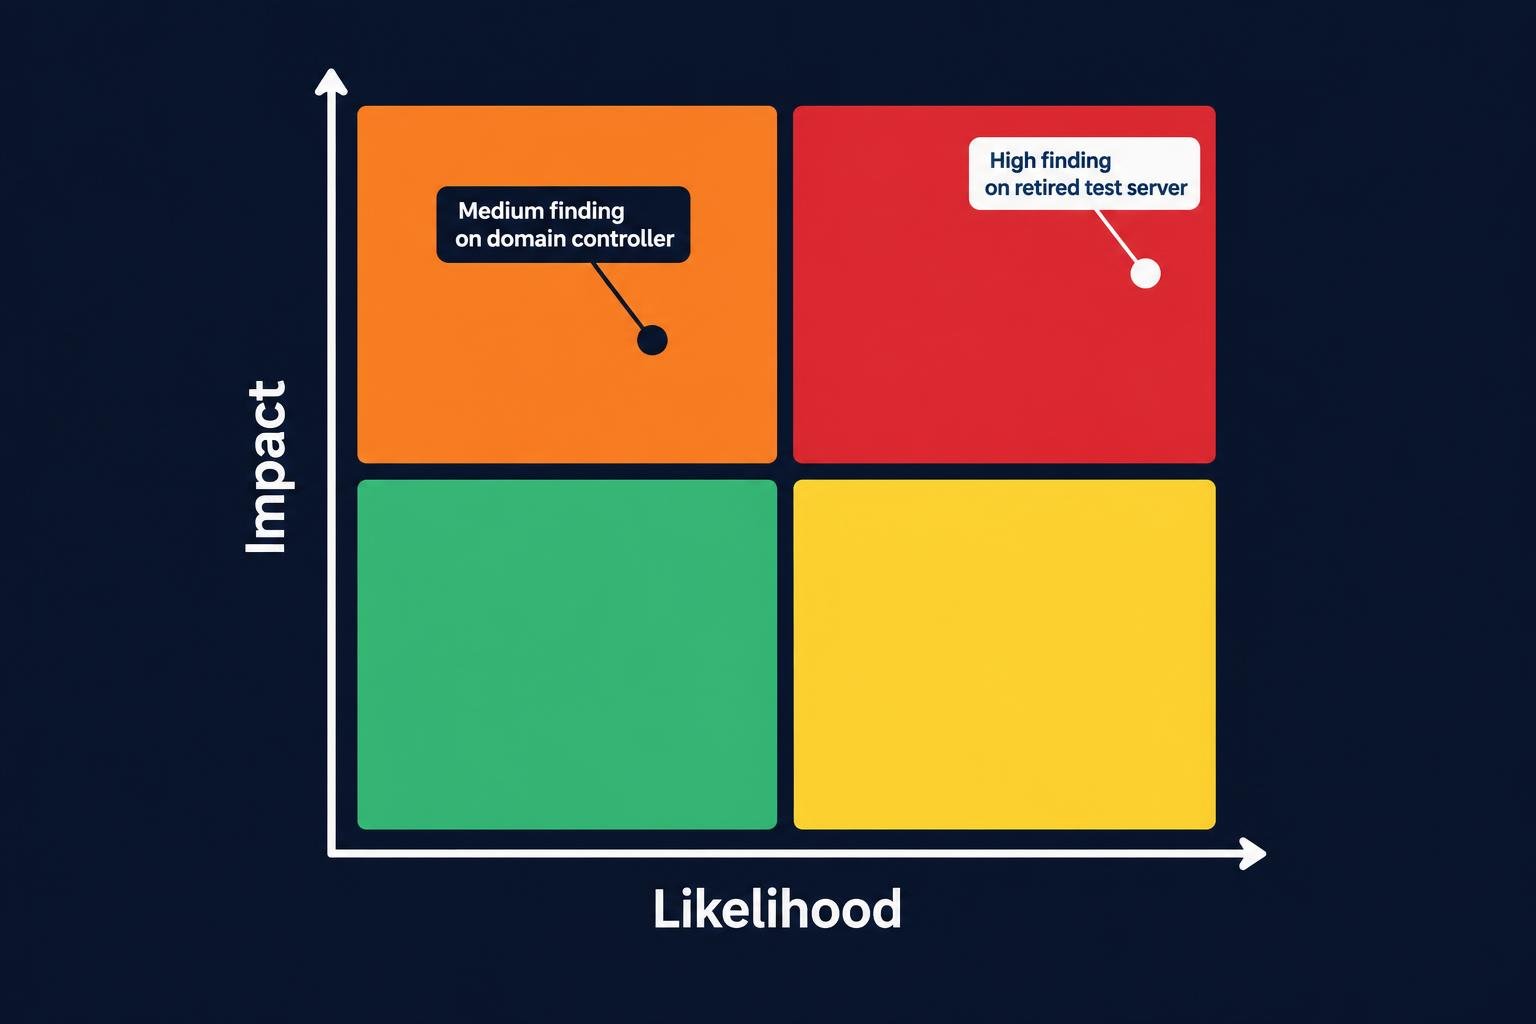
- Correlate with asset criticality. A medium-severity finding on a domain controller may matter more than a high-severity finding on a retired test server.
- Group by root cause. Ten alerts about outdated software on ten machines is really one patching problem, not ten separate issues.
This step turns a scanner report into something decision-makers can actually act on.
Step 6: Prioritize Using Risk, Not Just CVSS Score
CVSS scores measure technical severity, not just the CVSS score — not business risk. Combine the score with:
- Exposure: Is the vulnerable system internet-facing, or isolated on an internal segment?
- Asset value: Does it hold sensitive data or support critical operations?
- Exploitability: Is there a known exploit in the wild, or is this theoretical?
A simple risk matrix (Likelihood × Impact) helps stakeholders understand why one "medium" finding needs urgent attention while a "critical" one can wait for the next patch cycle.
Step 7: Report Findings Clearly
A good vulnerability assessment report has three layers:
- Executive summary — overall risk posture, top 3–5 issues, trend versus last assessment.
- Technical detail — affected systems, CVE references, remediation steps, evidence.
- Remediation roadmap — who owns each fix, target dates, and re-test plan.
Avoid delivering a raw scanner export as your final report. Leadership needs context and prioritization, not a data dump.
Step 8: Remediate and Re-Test
Assign each finding an owner and a deadline based on its priority tier. Track remediation in whatever system your team already uses (ticketing tool, spreadsheet, GRC platform). Once fixes are applied:
- Re-scan the affected systems to confirm the vulnerability is resolved.
- Update your asset inventory and risk register accordingly.
- Log lessons learned — recurring issues often point to a process gap (e.g., patch management) rather than a one-off mistake.
Step 9: Make Vulnerability Management a Cycle, Not a Project
A single assessment is a snapshot. Real risk reduction comes from repetition. Most organizations benefit from:
- Monthly or quarterly scans for internal networks
- Continuous scanning for internet-facing assets
- A full reassessment after major infrastructure changes
Building this cadence into your security calendar turns vulnerability management from a reactive scramble into a predictable, measurable program — something that also pays off directly when it’s time for compliance audits (ISO 27001, NCA ECC, PCI DSS, and similar frameworks all expect evidence of regular vulnerability management).
Practical Takeaway
- Scope and get written authorization before scanning anything, even internally.
- Build or validate a full asset inventory before running your first scan — unknown assets are often your biggest risk.
- Use authenticated scans for accuracy, and always validate results before reporting.
- Prioritize by business risk (exposure + asset value + exploitability), not raw CVSS score alone.
- Close the loop with remediation ownership, deadlines, and re-testing — a finding isn’t resolved until it’s verified.
- Repeat the cycle on a fixed schedule; vulnerability management is a program, not a one-time project.