
Have you ever wondered what happens when you press the power button on your PC and wait for your Windows desktop to appear? The Windows boot process is a complex sequence of events that brings your computer to life.

Edit
Full screen
Delete
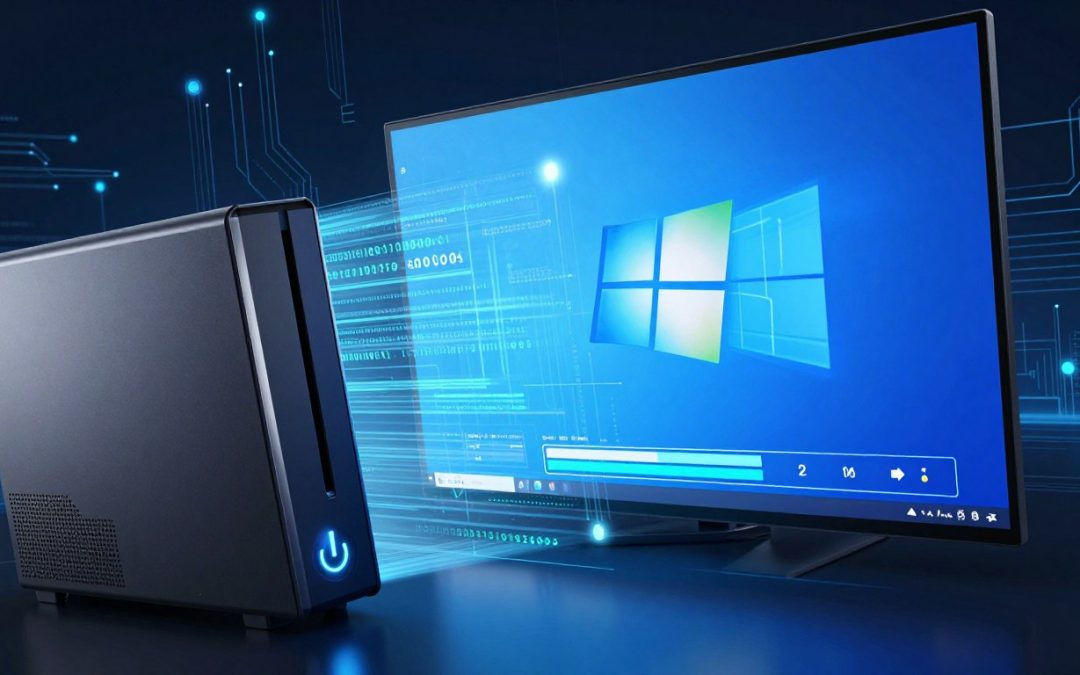
🔐 The Windows Boot Process — From Power-On to Desktop
The boot process is crucial for the proper functioning of your computer, as it initializes the hardware and loads the operating system. Understanding how this process works can help you troubleshoot issues and optimize your PC’s performance.
Key Takeaways
- The Windows boot process involves a series of steps that initialize the hardware and load the operating system.
- A successful boot process is essential for the proper functioning of your computer.
- Understanding the boot process can help you troubleshoot common issues.
- The boot process involves multiple stages, including firmware initialization and operating system loading.
- Optimizing the boot process can improve your PC’s overall performance.
The Journey of a Windows PC: From Off to On
The moment you press the power button, your Windows PC begins its journey to becoming operational. This initial step is more complex than it seems, involving a series of electrical and software processes.
What Happens When You Press the Power Button
Pressing the power button initiates the electrical sequence, which powers on the necessary components. This sequence is crucial for the proper functioning of the PC.
The Electrical Sequence
The electrical sequence involves the power supply unit (PSU) distributing power to various components such as the CPU, motherboard, and RAM. This process is fundamental to the boot process.
Initial Component Activation
As power is distributed, the initial components are activated. This includes the CPU, which begins executing instructions from the firmware.
The Importance of Understanding the Boot Process
Understanding the boot process is vital for troubleshooting and optimizing your PC’s performance. It helps in identifying issues and taking corrective actions.
Troubleshooting Benefits
Knowledge of the boot process aids in diagnosing problems such as boot loops or failure to boot. It enables users to take appropriate troubleshooting steps.
Performance Optimization Opportunities
By understanding how the boot process works, users can identify opportunities to optimize their PC’s startup time and overall performance.
BIOS vs. UEFI: The Pre-Boot Environment
Understanding the difference between BIOS and UEFI is essential for grasping how a computer boots up. The pre-boot environment is a critical phase that initializes hardware and prepares the system for the operating system.
Traditional BIOS: The Legacy System
The traditional BIOS has been the backbone of the boot process for decades. However, it comes with certain limitations.
MBR Partitioning Limitations
One significant limitation of traditional BIOS is its reliance on MBR (Master Boot Record) partitioning. MBR is restricted to handling disks up to 2TB in size and is limited to four primary partitions.
16-bit Operation Mode
BIOS operates in 16-bit mode, which can result in slower boot times and limited hardware support compared to more modern architectures.
Modern UEFI: Enhanced Security and Features
In contrast, UEFI (Unified Extensible Firmware Interface) offers several advancements over traditional BIOS, including enhanced security features and better support for modern hardware.
Secure Boot Technology
One of the key features of UEFI is Secure Boot, which ensures that only authorized firmware and operating systems can run on the computer, thereby enhancing security.
GPT Partitioning Advantages
UEFI supports GPT (GUID Partition Table) partitioning, which can handle disks of much larger sizes and offers more flexible partitioning options compared to MBR.
How to Access Your System’s Firmware Settings
Accessing your system’s firmware settings, whether it’s BIOS or UEFI, typically involves pressing a specific key during the boot process.
Common Access Keys by Manufacturer
Common keys used to access firmware settings include F2, F12, DEL, and ESC, though this can vary by manufacturer. It’s essential to check your computer’s manual or manufacturer’s website for the correct key.
POST Process: The Hardware Check
The Power-On Self Test is a diagnostic test performed by the computer’s firmware. It checks the system’s hardware to ensure that it is functioning properly before proceeding to load the operating system.
What is the Power-On Self Test?
The POST process is initiated when you press the power button on your computer. It is a series of tests that verify the integrity and functionality of the system’s hardware components, including the CPU, memory, and storage devices.
Common POST Error Codes and Beeps
During the POST process, the system may encounter errors that prevent it from booting normally. These errors can be indicated through beep patterns or visual error messages.
Decoding Beep Patterns
Beep patterns can vary depending on the BIOS manufacturer. For example, AMI BIOS uses a specific pattern to indicate different types of errors.
| Beep Pattern | Error Description |
| 1 short beep | Memory refresh timer error |
| 2 short beeps | Parity error in base memory |
| 3 short beeps | Base memory read/write error |
Visual Error Indicators
Some systems display error messages on the screen during POST. These messages can provide more detailed information about the nature of the problem.
“A bootable device has not been detected. Please ensure that a bootable device is properly connected and configured.”
Critical Components Verified During POST
The POST process checks several critical components to ensure system integrity.
Memory Testing
The POST process tests the system’s RAM to ensure it is functioning correctly.
CPU and Essential Hardware Checks
The CPU and other essential hardware components are verified during POST to ensure they are operational.
Boot Device Selection: Finding the Operating System
The process of selecting a boot device is a fundamental step in the boot sequence. When a PC starts, it needs to identify which device contains the operating system to load.
The Boot Order and How to Change It
The boot order is a sequence of devices that the PC checks for a bootable operating system. To change the boot order, you need to access your system’s firmware settings, typically by pressing a key like F2, F12, or Del during the initial boot phase.
BIOS/UEFI Boot Priority Settings
Within the BIOS or UEFI settings, you can adjust the boot priority. This is usually done by navigating to the Boot Options or Boot Order section and rearranging the list to prioritize your preferred boot device.
Edit
Delete
Multiple Boot Options: Dual-Booting Windows
Dual-booting allows you to install multiple operating systems on a single PC. When you start your computer, you’ll be presented with a menu to choose which operating system to load.
Boot Menu Access Keys
To access the boot menu, you typically press a specific key during startup, such as F12 or Esc. This allows you to manually select the boot device or operating system.
External Boot Devices: USB, CD/DVD, and Network
External devices like USB drives, CDs/DVDs, and network locations can be used as boot devices. This is useful for installing operating systems or running diagnostic tools.
Creating Bootable Media
To create bootable media, you’ll need to use a tool to format the device and transfer the necessary boot files. Tools like Rufus for USB drives are popular for this task.
Network PXE Boot
Network PXE (Preboot Execution Environment) boot allows a PC to boot from a network location. This is commonly used in enterprise environments for deploying operating systems.
| Boot Device | Description | Use Case |
| USB Drive | Portable storage device | Installing OS, running diagnostics |
| CD/DVD | Optical disc | Installing OS, running diagnostics |
| Network PXE | Network location | Deploying OS in enterprise environments |
🔐 The Windows Boot Process — From Power-On to Desktop
Understanding the Windows boot process is crucial for troubleshooting and optimizing system performance. The Windows boot process involves several key components that work together seamlessly to load the operating system.
The Boot Manager: Windows Boot Manager (BOOTMGR)
The Windows Boot Manager, known as BOOTMGR, plays a pivotal role in the boot process. It is responsible for loading the operating system.
Location and Function
BOOTMGR is typically located in the root directory of the system partition. Its primary function is to identify and load the Windows Boot Loader.
Boot Configuration Data (BCD) Store
The BCD Store is a critical component that contains boot configuration data. It is used by the Windows Boot Manager to determine how to proceed with the boot process.
Managing Boot Entries with BCDEdit
BCDEdit is a command-line tool used to manage boot entries in the BCD Store. It allows users to modify boot options, add new operating systems, and adjust the boot order.
The Windows Boot Loader (WINLOAD.EXE)
The Windows Boot Loader, WINLOAD.EXE, is responsible for loading the Windows kernel into memory. This is a crucial step in the boot process.
Loading the Windows Kernel
WINLOAD.EXE loads the Windows kernel, NTOSKRNL.EXE, into memory, enabling the operating system to take control.
Driver Signature Verification
During the boot process, WINLOAD.EXE verifies the signatures of drivers to ensure they are legitimate and have not been tampered with.
| Component | Function |
| BOOTMGR | Loads the Windows Boot Loader |
| BCD Store | Contains boot configuration data |
| WINLOAD.EXE | Loads the Windows kernel |
In conclusion, the Windows boot process is a complex sequence of events involving the Windows Boot Manager, BCD Store, and Windows Boot Loader. Understanding these components and their functions is essential for effective troubleshooting and system optimization.
Kernel Loading: The Core of Windows
As the heart of the Windows operating system, the kernel plays a pivotal role in its functionality. Kernel loading is a complex process that involves several critical components.
NTOSKRNL.EXE: The Windows NT Kernel
The NTOSKRNL.EXE is the core part of the Windows NT kernel, responsible for managing hardware resources and providing basic services to the operating system. During kernel loading, NTOSKRNL.EXE initializes memory management.
Memory Management Initialization
This involves setting up the memory manager, which handles the allocation and deallocation of memory for the operating system and applications.
Process and Thread Creation
The kernel also initializes process and thread creation, laying the groundwork for running applications and system services.
HAL: Hardware Abstraction Layer
The Hardware Abstraction Layer (HAL) is a critical component that provides a layer of abstraction between the operating system and hardware. It enables Windows to run on different hardware platforms.
System-Specific Hardware Support
HAL provides system-specific hardware support, allowing the operating system to interact with various hardware configurations.

Edit
Full screen
Delete
Windows Kernel Loading
Registry Hive Loading
Registry hive loading is an essential step in the kernel loading process. It involves loading critical registry hives that contain configuration data for the operating system.
Critical System Hives
Critical system hives, such as the SAM and SYSTEM hives, are loaded during this process.
Configuration Loading Sequence
The configuration loading sequence ensures that the operating system is configured correctly based on the data stored in the registry hives.
The kernel loading process is fundamental to the operation of Windows, involving the initialization of critical components like NTOSKRNL.EXE and HAL, as well as the loading of registry hives.
Windows Startup Process: Services and Drivers
The Windows startup process is a complex sequence of events that brings the operating system to life, loading necessary services and drivers. This phase is critical for the proper functioning of the system, as it initializes essential components that enable user interaction and overall system performance.
Session Manager (SMSS.EXE)
The Session Manager, or SMSS.EXE, is a crucial component that initializes the Windows session. It is responsible for creating the system environment and starting other essential subsystems.
Subsystem Initialization
During this phase, SMSS.EXE initializes the Windows subsystem, which includes setting up the environment for the operating system to function correctly. This involves loading necessary drivers and starting critical system processes.
Windows Initialization Process (WININIT)
Following the Session Manager’s initialization, the Windows Initialization Process (WININIT) takes over. This process is vital for preparing the system for user interaction.
User Session Creation
As part of the Windows Initialization Process, the system creates a user session, setting the stage for user login and subsequent desktop loading. This step is essential for a seamless user experience.
Service Control Manager and Service Startup
The Service Control Manager is responsible for managing system services, determining which services to start during the boot process. Services are programs that run in the background, providing various system functionalities.
Automatic vs. Manual Services
Services can be configured to start automatically during boot or manually by the user or system components. Understanding the difference between these configurations is crucial for managing system resources and optimizing performance.
Driver Loading Sequence
The loading of drivers is a critical aspect of the startup process. Drivers are software components that enable the operating system to communicate with hardware devices. The sequence in which drivers are loaded is determined by the system’s configuration and the dependencies between drivers.
User Authentication and Desktop Loading
The final stages of the Windows boot process involve user authentication, a crucial security step that protects user data and privacy. This process ensures that only authorized users can access the desktop and its associated resources.
Windows Logon Process
The Windows logon process is responsible for authenticating users. This can be done through various methods, including:
- Password-based authentication
- Biometric authentication (e.g., fingerprint or facial recognition)
- Smart card authentication
Local vs. Domain Authentication
Windows supports both local and domain authentication. Local authentication involves verifying user credentials against the local user database, while domain authentication checks credentials against a centralized domain controller.
Windows Hello and Biometric Options
Windows Hello is a feature that enables biometric authentication, providing an additional layer of security and convenience. Users can opt for fingerprint, facial recognition, or iris scanning to log in.
User Profile Loading
After successful authentication, the user’s profile is loaded. This involves:
- Loading the user’s registry hive
- Initializing user-specific settings and preferences
Registry User Hive Mounting
The user’s registry hive is mounted, allowing Windows to access user-specific settings and preferences.
Shell Initialization (Explorer.exe)
The Windows shell, also known as Explorer.exe, is initialized, providing the user interface and desktop environment.
- Startup programs and services are launched
- The desktop is rendered and displayed to the user

Edit
Full screen
Delete
Windows Logon Process
By understanding the user authentication and desktop loading process, users can better appreciate the complexity and security measures built into the Windows operating system.
Modern Boot Features and Optimization
Windows has evolved its boot process over the years, incorporating features like Fast Startup and Secure Boot. These advancements aim to enhance both the security and performance of the operating system.
Fast Startup: Hybrid Boot Technology
Fast Startup is a feature that combines the benefits of a cold shutdown and hibernation. When you shut down your PC with Fast Startup enabled, it saves the kernel session and device drivers to the hibernation file.
How Hibernation Powers Fast Startup
Hibernation allows the system to save its current state to a file on the hard drive, known as hiberfil.sys. This file is then used during the boot process to quickly resume the system state.
Pros and Cons of Fast Startup
While Fast Startup reduces boot times, it may cause issues with certain systems, particularly those with outdated drivers or firmware. It’s essential to weigh the benefits against potential compatibility problems.
Secure Boot Protection
Secure Boot is a feature designed to protect the system from malware by ensuring that only authorized firmware and software are loaded during the boot process.
Preventing Rootkits and Bootkits
By verifying the authenticity of the boot loader and other components, Secure Boot prevents the installation of rootkits and bootkits, thus enhancing system security.
Boot Performance Optimization
Optimizing boot performance involves several strategies, including the use of Startup Impact Analysis Tools and choosing the right storage drive.
Startup Impact Analysis Tools
These tools help identify applications that significantly impact boot times, allowing users to manage startup programs more effectively.
SSD vs. HDD Boot Times
Using a Solid-State Drive (SSD) can dramatically reduce boot times compared to traditional Hard Disk Drives (HDDs). SSDs offer faster data access times, making them ideal for improving boot performance.
Troubleshooting Common Boot Problems
Troubleshooting boot issues in Windows can be a daunting task, but understanding the common causes and solutions can simplify the process.
Windows Won’t Start: Common Causes
When Windows fails to boot, it’s often due to either hardware or software issues. Common causes include corrupted system files, driver issues, and hardware failures.
Hardware vs. Software Issues
Distinguishing between hardware and software problems is crucial. Hardware issues might involve faulty RAM or a failing hard drive, while software issues could be related to corrupted drivers or system files.
Using Safe Mode and Recovery Options
Safe Mode is a diagnostic mode that starts Windows with a minimal set of drivers and services. It’s useful for troubleshooting issues.
Advanced Startup Options Menu
The Advanced Startup Options menu provides additional troubleshooting tools, including System Restore and Command Prompt.
Boot Repair Tools and Techniques
Windows includes several built-in tools for repairing boot issues, such as Automatic Repair and Command Prompt recovery commands.
Automatic Repair Process
The Automatic Repair tool can fix certain problems that prevent Windows from loading, such as missing or damaged system files.
Command Prompt Recovery Commands
Using Command Prompt, users can execute commands like bootrec /fixmbr and bootrec /fixboot to repair the Master Boot Record and Boot Sector.
| Command | Description |
| bootrec /fixmbr | Repairs the Master Boot Record |
| bootrec /fixboot | Repairs the Boot Sector |
| sfc /scannow | Scans and replaces corrupted system files |
Conclusion: The Complete Windows Boot Journey
The Windows boot process is a complex sequence of events that transforms your PC from a powered-off state to a fully functional desktop environment. Understanding this journey is crucial for maintaining and optimizing your computer.
From the initial power-on to the loading of the desktop, the boot process involves several key stages, including the Power-On Self Test (POST), boot device selection, and the loading of the Windows kernel. Each stage plays a vital role in ensuring your PC starts up correctly and efficiently.
By grasping the Windows boot journey, you can better troubleshoot issues, optimize boot times, and enhance overall system performance. This knowledge empowers you to take control of your PC’s startup process, making it an essential aspect of PC maintenance and optimization, marking the boot process conclusion.
FAQ
What is the Windows boot process?
The Windows boot process is the sequence of events that occurs when a Windows PC is powered on, from the initial power-on to the display of the desktop.
What is the difference between BIOS and UEFI?
BIOS (Basic Input/Output System) is a traditional firmware interface, while UEFI (Unified Extensible Firmware Interface) is a modern firmware interface that provides enhanced security features, such as Secure Boot, and supports larger storage devices.
What is the Power-On Self Test (POST)?
The Power-On Self Test (POST) is a diagnostic test performed by the firmware during the boot process to verify that the hardware components, such as memory and CPU, are functioning properly.
How do I change the boot order in BIOS/UEFI?
To change the boot order, you need to access the BIOS/UEFI settings, usually by pressing a specific key during boot-up, such as F2, F12, or Del, and then navigate to the Boot Options or Boot Order section to set the desired boot device priority.
What is the Windows Boot Manager (BOOTMGR)?
The Windows Boot Manager (BOOTMGR) is a component responsible for loading the Windows operating system, managing boot entries, and controlling the boot process.
How do I troubleshoot boot problems in Windows?
To troubleshoot boot problems, you can try using Safe Mode, accessing recovery options, such as the Advanced Startup Options Menu, or using boot repair tools, like the Automatic Repair Process or Command Prompt recovery commands.
What is Fast Startup, and how does it work?
Fast Startup is a feature that combines elements of hibernation and shutdown to quickly boot up Windows, allowing for faster startup times by leveraging the hibernation file to store system information.
What is Secure Boot, and how does it protect my PC?
Secure Boot is a feature that prevents malware from loading during the boot process by verifying the authenticity of the firmware and operating system components, thus protecting your PC from rootkits and bootkits.
How can I optimize my PC’s boot performance?
To optimize boot performance, you can use tools like the Startup Impact Analysis Tool, disable unnecessary startup programs, and consider using a solid-state drive (SSD) instead of a traditional hard disk drive (HDD).